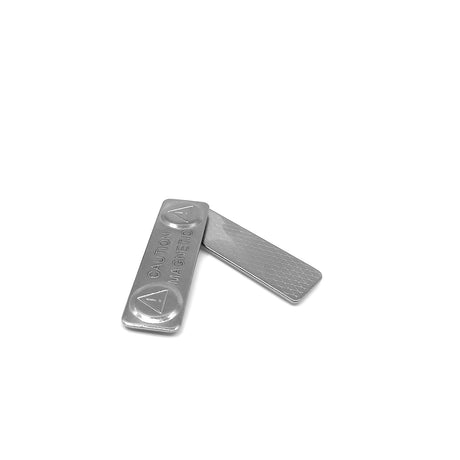
Selvklæbende magneter
Som et alternativ til at lime selv kan du tage et kig på vores udvalg af selvklæbende magneter. Supermagneter med selvklæber er den nemme og bekvemme løsning, hvis man skal sætte en magnet fast, men man ikke har tid til at forarbejde magneten og gøre den klar med lim.
Selvklæbende neodymmagneter er især populære i emballageindustrien og hos bygherrer og udstillere. De bruges til alt fra magnetlukning på bøger og magnetiske nøgleholdere til ophængning af byggematerialer, hvor der ikke må bores huller. Ofte i kombination med magnetisk metal.
De selvklæbende supermagneter har et lag kraftig 3M-lim på den ene side og et lille stykke beskyttende lag folie ovenpå, så magneten først kan klæbe sig fast, når man fjerner folien. Fjern beskyttelsesfolien umiddelbart før brug, og rør ikke ved limen efter fjernelse af folien. Vi sælger de selvhæftende magneter i pakker á 10 stk. sat sammen i par, dvs. 5 stk. med en nordpol og 5 stk. med en sydpol "opad".
Selvklæbende neodym magneter er generelt ikke egnet til udendørs brug, da de kan ruste. Brug istedet gummimagneter.
OBS! Selvklæbende magneter kan sjældent bruges på stof/tøj, da fibrene ødelægger klæbeevnen. Derfor skal du hellere overveje en lim-selv løsning til stof og tøj, hvor limen er egnet til både magneter og stof.
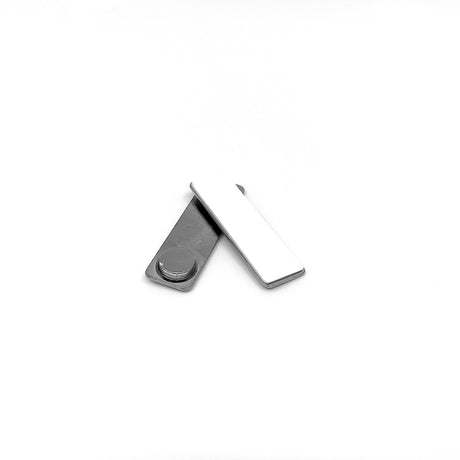
Selvklæbende magnetbånd
Den lidt mere fleksible magnetløsning er magnetbånd med selvklæber (også kaldet magnettape). Magnetbåndet har også fået et lag kraftig 3M-lim på den ene side og en strimmel film ovenpå, så magnetbåndet først er selvklæbende, når man fjerner filmen. Magnetbånd kan klippes i små eller store stykker med en alm. saks. Limen er ikke lige så kraftig som på powermagneterne, så man kan lidt nemmere fortryde en placering efterfølgende med magnetisk tape.
Det kan være en udfordring at bruge det selvklæbende magnetbånd på stof med løse fibre, da det ødelægger klæbeevnen. Så overvej i stedet at så magnetbånd fast på stoffet.
OBS! Magnetbåndet har ikke lige så kraftigt et magnetfelt som powermagneterne, men det kan stadig holde en del.
 €1,12Unit price /UnavailableIn stockMAGZ-902-E
 €22,34Unit price /UnavailableIn stockMAGZ-717-L
 €21,09Unit price /UnavailableLow stockMAGZ-720-L
 €58,53Unit price /UnavailableBackorderMAGZ-8907-L
 €13,10Unit price /UnavailableIn stockMAGZ-222-M
 Not a magnetMin. order: 10 pcs.€0,87Unit price /UnavailableIn stockMAGZ-289-M